How the Solar Innovator System Works — Official DIY Solar Guide
A complete breakdown of the 3D solar sphere concept, components, assembly steps, realistic output, and safety requirements.
The Solar Innovator System is a digital guide — not a pre-built device. It teaches you how to construct a small-scale, 3D spherical solar assembly using affordable components from local hardware stores. Think of it as a hands-on learning project that produces a working small solar power source.
Solar cells convert light energy from the sun into direct current (DC) electricity through the photovoltaic effect. A charge controller regulates the power flow to prevent battery overcharge. An inverter (optional) converts DC to AC for standard household devices.
📖 Learn solar basics at Energy.gov →- Charging smartphones, tablets, and USB devices
- Powering LED lighting in a workshop, shed, or patio
- Emergency backup for small electronics
- Educational project to learn about renewable energy
- Off-grid experimentation and prototyping
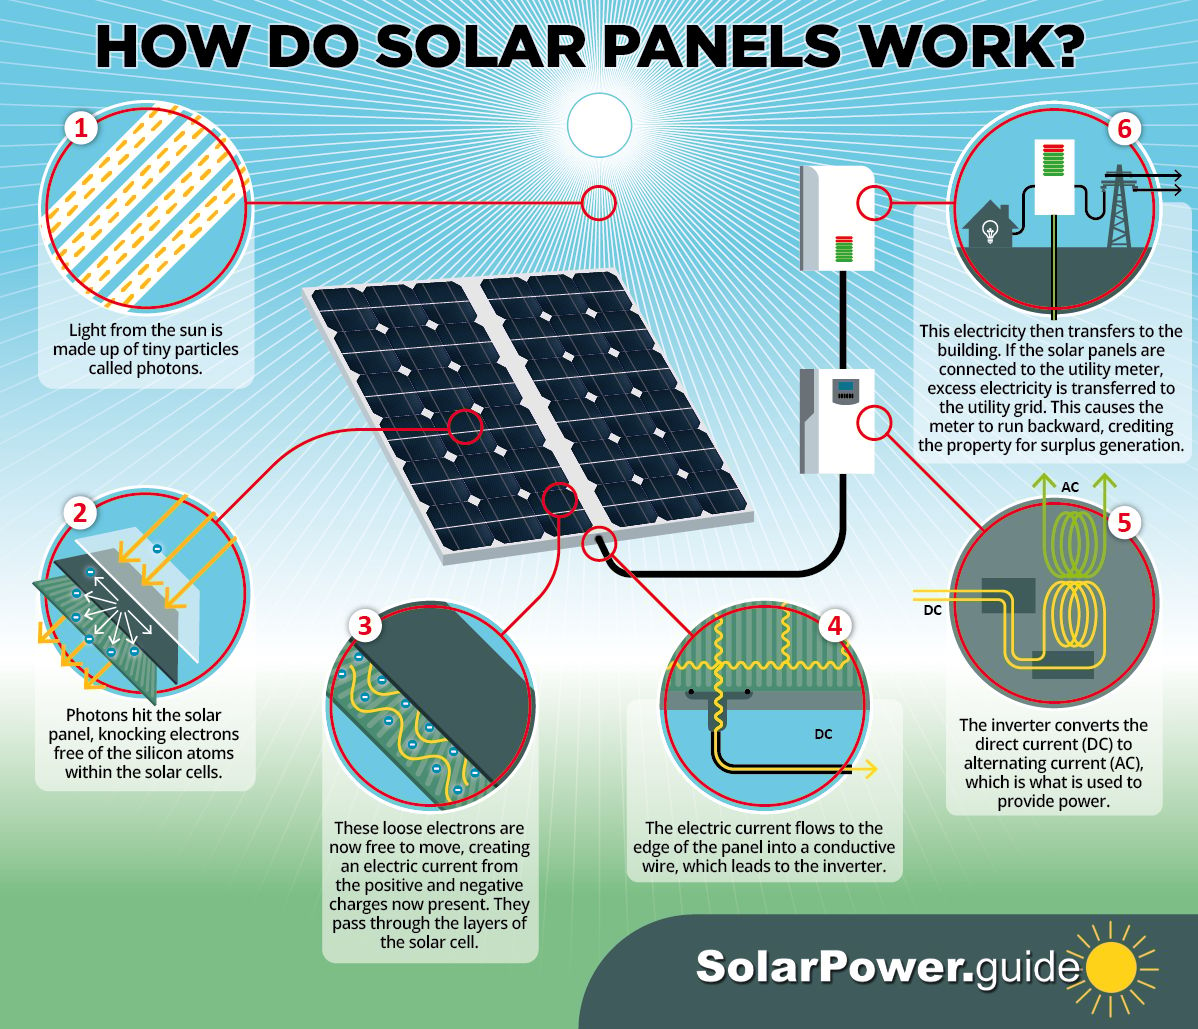
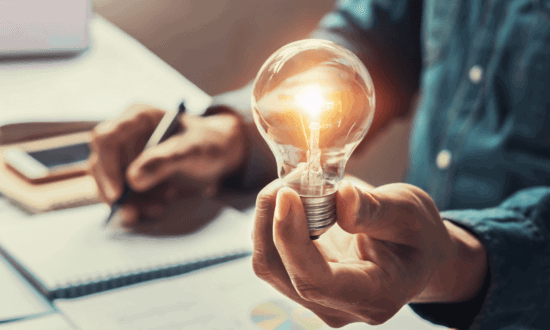
A flat solar panel generates maximum power only when facing the sun directly. A 3D spherical arrangement places solar cells on multiple faces, allowing some cells to receive useful light even as the sun moves. This can reduce the need for manual repositioning throughout the day.
Solar cells capture both direct sunlight (clear sky, sun facing the panel) and diffuse light (scattered on cloudy or partially overcast days). The 3D design allows more surface area to interact with diffuse light from various directions.
Even a 3D design is affected by shade. Any cell shaded by nearby objects, walls, or the sphere's own frame will produce less power. Choosing a placement with maximum open sky exposure significantly affects your real-world output.
The core energy-generating elements. The guide covers small monocrystalline or polycrystalline solar cells that can be wired in series or parallel to achieve your target voltage and current output.
A lightweight, durable frame holds the solar cells in the spherical arrangement. Common materials include PVC pipe, aluminum angle stock, or wood — all available at hardware stores.
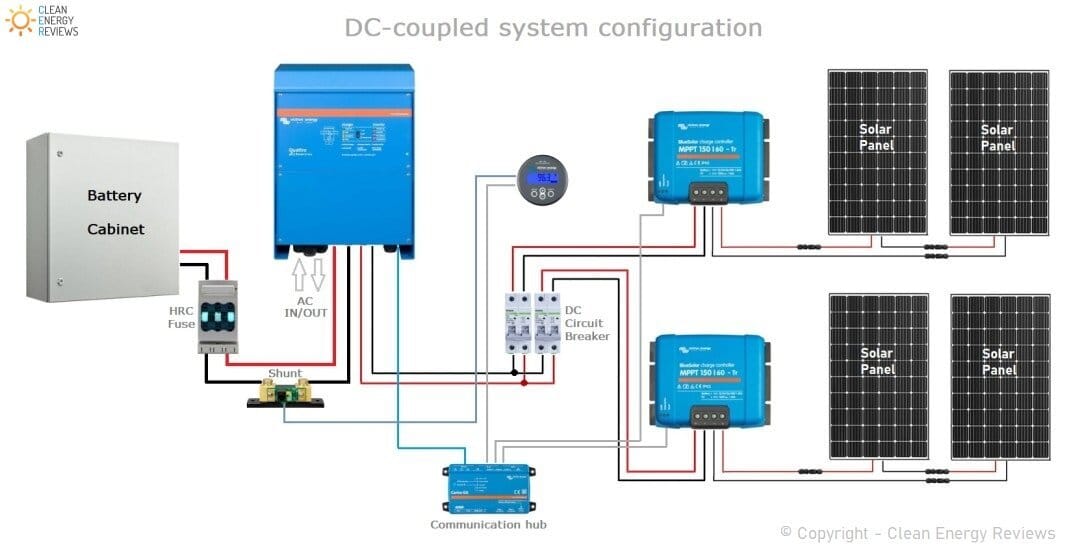
Appropriately rated solar wire, MC4 or similar connectors, and correctly sized fuses are essential for safe operation. The guide specifies wire gauges based on the expected current in your build.
A deep-cycle lead-acid or lithium battery stores energy for use after sunset or on cloudy days. Capacity is measured in amp-hours (Ah) — the guide helps you size a battery that matches your device loads.
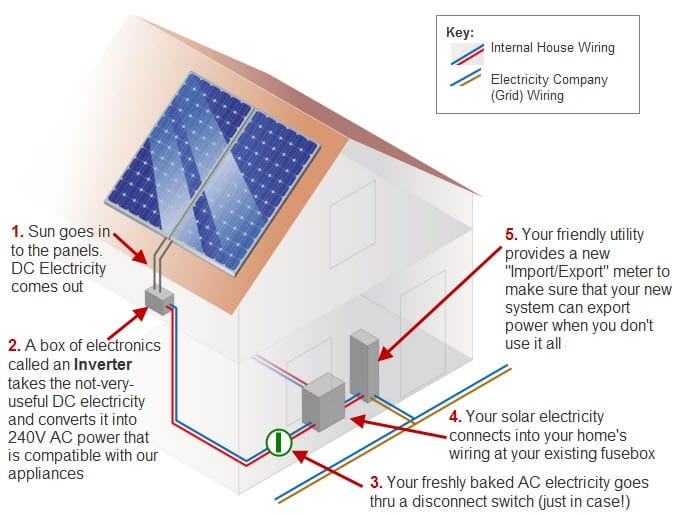
A pure sine wave inverter converts DC battery power to standard AC electricity for household devices. Not required for USB and 12V DC loads, but necessary if you want to run standard AC appliances.
Plan Your Energy Needs
List the devices you want to power and find their wattage on the label or specification sheet. Multiply watts × daily hours of use to get watt-hours per day. This tells you what solar panel area and battery capacity you need.
Source Compatible Components
Use the guide's materials checklist to identify and purchase solar cells, wiring, connectors, charge controller, battery, and frame materials. Compare prices across local stores and online suppliers.
Assemble the 3D Solar Frame
Follow the illustrated blueprints to cut, join, and mount the structural frame. Attach solar cells to each face according to the assembly sequence in the guide. Take care with cell polarity and connection sequence.
Connect the Electrical Components
Wire solar cells to the charge controller input. Connect the charge controller output to the battery. Connect battery to inverter (if used) or to DC loads directly. Install all required fuses and disconnect switches before connecting the battery.
Test System Output Safely
Place the system in full sunlight and use a multimeter to measure open-circuit voltage and short-circuit current at the solar output. Verify charge controller readings match battery specifications. Connect small test loads before full deployment.
LED bulbs (typically 5–15W) and USB chargers (5–20W) are the most practical loads for a small DIY solar system. These low-wattage devices are well-suited to the output of a compact solar build.
Smartphones, tablets, small radios, and Bluetooth speakers can be powered or charged comfortably. A small battery bank in the system allows use after dark, extending the practical utility of your build.
In a power outage, a charged battery connected to your DIY system can keep essential small devices running — emergency radios, flashlights, phone chargers — for several hours depending on battery capacity.
Sunlight Hours and Weather
More daily sun hours = more energy. Cloudy climates produce significantly less output. Your local peak sun hours determine realistic daily generation.
Panel Quality and Surface Area
Higher efficiency cells and greater total cell area produce more power. Budget cells generate less per square foot. The guide helps you select appropriate cells for your goals.
Shading and System Placement
Even partial shade on one cell can reduce the output of an entire string. Choose an open, unobstructed location with maximum sky exposure.
Battery and Inverter Efficiency
Batteries lose some energy during charge/discharge cycles. Inverters convert DC to AC with 85–95% efficiency. These losses reduce total usable power from your system.
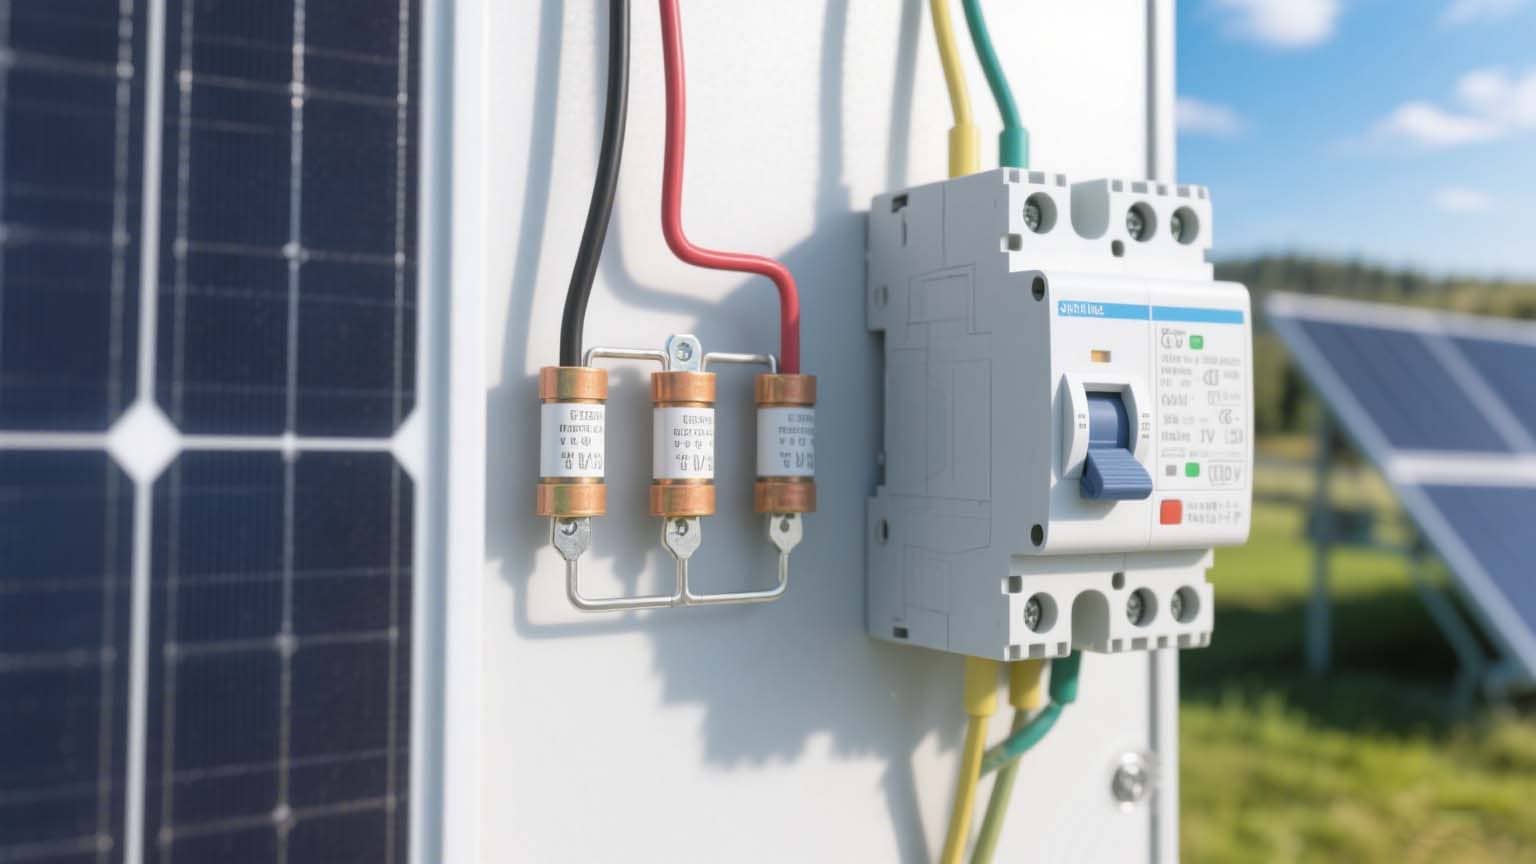
Undersized wires can overheat and cause fires. Each circuit segment requires a correctly rated fuse or circuit breaker installed close to the battery positive terminal. The guide specifies fuse and wire ratings for its recommended builds.
Never connect a DIY solar build to your home's grid or household wiring without a licensed electrician and the appropriate grid-tie inverter and permits. Backfeeding the grid is dangerous and may be illegal without proper equipment.
Some jurisdictions require permits for solar installations above certain wattages. Stand-alone off-grid systems are typically simpler to permit than grid-tied ones, but local rules vary. Check with your local authority before installation.
If you are unsure about any wiring step, battery type, or connection point — consult a licensed electrician. The cost of professional advice is far less than the cost of a wiring fire or electrical injury.
| Feature | Solar Innovator System (DIY Guide) | Standard Flat DIY Solar Panel |
|---|---|---|
| Design | 3D spherical, multi-angle | Flat, single-angle |
| Guide cost | $39 digital download | Free online tutorials |
| Material cost | ~$73–$200+ (user-sourced) | ~$50–$300+ (panel dependent) |
| Beginner-friendly guide | ✓ Yes | Varies by tutorial quality |
| Manual repositioning | Less frequent needed | Fixed tilt, or manual tracking |
| Space required | ~12 sq ft | Variable (panel size) |
| Certification | ✗ Not a certified product | Panels themselves may be certified |
| Grid-tie compatible | ✗ DIY only | Possible with certified inverter |
Solar systems produce less power on cloudy days but do not stop completely. Diffuse light still generates some output. A battery bank helps store excess energy from sunny days for use during low-light periods.
A battery is not strictly required if you only want to power loads during daylight hours. However, a battery allows you to store energy for use at night or during cloudy periods, which significantly increases the system's usefulness.
A small DIY solar build can power low-wattage devices (LED lights, phone chargers, small radios). High-draw appliances like refrigerators, washing machines, or air conditioners require a much larger system than a typical Solar Innovator System build.
No — not without professional installation. Connecting any home-built equipment to your household electrical panel requires a licensed electrician, a certified grid-tie inverter, and local permits. Attempting this without qualifications is dangerous and likely illegal.